Add a splash screen to a .NET MAUI app
In this blog, we will learn how to change/add a Splash screen for the .Net MAUI apps. Below is the default Splash screen added by .Net MAUI which we get when we first create a project.


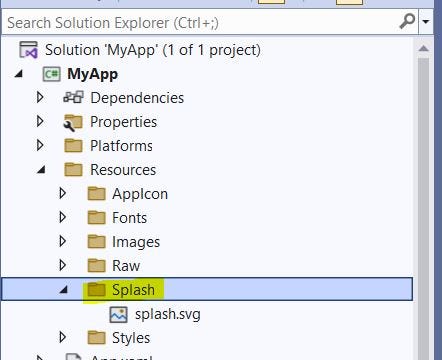
- So to change the splash screen expand the Resources folder of your project.

2. Look for the Splash folder inside Resources.

3. Replace splash.svg with your custom image & make sure the BuildAction of this image should be MauiSplashScreen. Right-click on your new splash image & select properties.

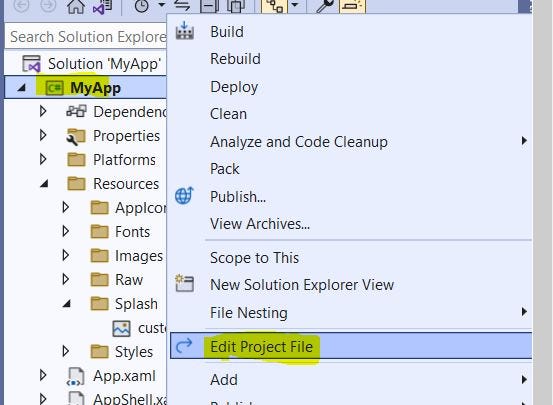
4. Edit the project file by right-clicking on the root project & select Edit Project File.

5. From the Project File make sure your custom splash image name is replaced in the given places if not then change it to your new splash screen image name with extension, With BaseSize you can change the Splash Image size & can change the background color.

6. Now finally clean & rebuild your solution, which strangely might give you the below build error.

7. Simply ignore this error & directly run the app on your selected device & you will see it’s working fine.


Thanks for following the blog till here, you can check my other blog How to consume Rest API from .Net MAUI. Happy Coding :D
